|
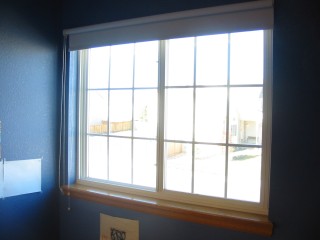
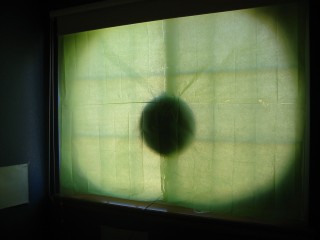
Here's one of the windows, as seen from the inside. (This is Kevin's bedroom; the other window belongs to my other son, Zach.) It's a big window, divided vertically; the right half can slide open to the left. But it was already getting chilly in October, so we just left the windows closed for the couple weeks this display was up.
|  |
|
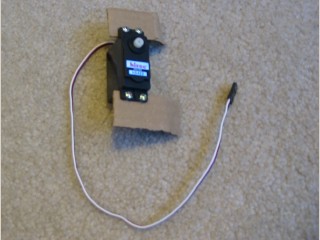
For each servo, I cut two wide strips of cardboard from a shipping container. Holes were punched into the strips in line with the mounting ears on the servos, and the servos were then attached with 3 mm nuts and bolts as shown. I held this up to the center window frame, as you'll see in the next picture, and bent the cardboard around it. Then I ran for the tape.
|  |
|
Using liberal amounts of packing tape, I attached each servo to the center post of its window. Note that this post is actually the left side of the sliding pane. This is shown at right from two different angles.
|  |
|
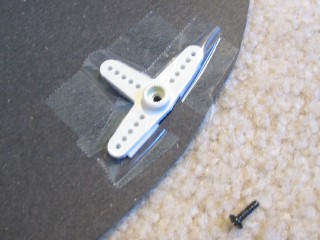
Next, I made pupils by cutting large circles out of black poster board. Note that it's important for these to be true circles, even though I would normally prefer elliptical pupils for a more "cartoonish" look. I got some three-arm servo horns (actually, I used a three-arm horn for one eye and a two-arm horn for the other since that's what was available), and stuck them to the pupil, very close to one edge, using double-sided mounting tape. Then, for good measure, I reinforced this with packing tape. (I like packing tape.)
Also shown here is the little servo horn screw, which will soon be used to attach the pupil to the servo on the window. (Of course this involves punching a small hole through the poster board at the center of the horn.)
|  |
|
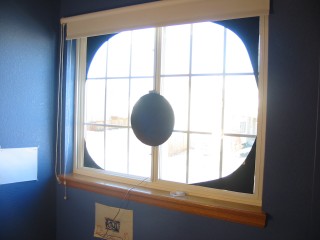
After mounting the pupil onto the servo, I cut some more posterboard pieces to round out the corners of the window. These were attached with scotch tape. The result looks like the image at right.
|  |
|
Next, to give our giant monster eyes a healthy green backing, I bought some light green tissue paper at a Hallmark store. Four sheets were taped together (again with the packing tape) for each window, and these tissue "curtains" were then hung over the window with yet more tape. The completed window is shown at right. The one in Zach's room was assembled the same way.
Just barely visible in this image is a standard servo extension cord, running down along the window frame and then out over the sill, to connect to the electronics. The electronics sat here in Kevin's room, so this one was easy. But for the other room, I needed to make a long custom servo cable. I did this by buying a short extension cord, cutting it, and soldering in in some very long wires.
|  |
|
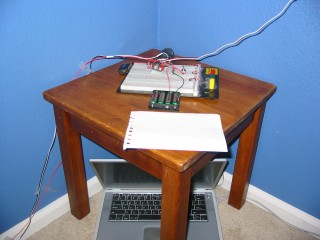
Here's the electronics and computer. The laptop was put under the table to give it a little protection against youthful chaos. Electronics were unprotected, except for a note (folded down in this picture) that reads "please do not touch." You can see the regular servo extension cord coming in from the upper right, and my custom one (a black/white dual-conductor wire plus a red wire -- I didn't have any three-conductor wire handy) coming in from the lower left.
|  |
|
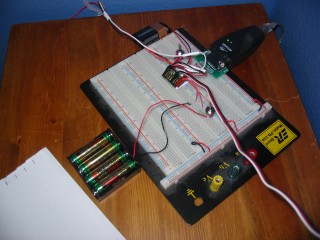
Finally, here's a close-up of the electronics. What we have here is a ridiculously large breadboard with almost nothing on it. To be more precise, the breadboard holds three components: two switches (for the 9V battery driving the controller circuitry, and the 4 AA batteries providing servo power), and one serial-to-breadboard adapter.
The Pololu servo controller you can barely see here; it's that thing about the size of a postage stamp, where all the wires come together. It's not actually connected to the breadboard directly, but only via various power and signal connectors. If I had been slightly less lazy, I could have easily dispensed with the breadboard altogether and put this all in a nice neat project box. Maybe next year!
|  |